How to assemble a 3D paper sculpture
- Mesh&Craft
- Oct 19, 2018
- 4 min read

With this tutorial you'll be able to assemble a 3D paper sculpture with no issues and no doubts!
Let's start from the beginning....let's say that you have a DIY kit,
You already know for sure that a 3D sculpture is a result of a design process that turn a 3D model into a planar set of pieces to cut fold and glue in order to assemble the 3D sculpture.
So a pug 3D model is transformed into a "meshed" model
A mesh is a collection of vertices, edges and faces that defines the shape of an object in 3D computer graphics and solid modeling.

and then into a group of sheets to cut and fold

NOW WHAT?
the raw material you need.....
PAPER
Choose you paper
You will need a HARD, HEAVY, SOLID, THICK paper !
What you need is CARDSTOCK!
Card stock = paper with weights from 50 lb to 110 lb (about 135 to 300 g/m²).
I use 250 GSM paper (Grams per Square Meter) and I find it best combination to print on and work within smaller details.
Being italian i usually refer to GSM, the higher the GSM number, the heavier the paper.
Here you can find a few conversion tables that could help you:

while here you can find a conversion table between LBS and GSM

Although any GSM is available, you’ll most commonly find: 90gsm, 100gsm, 120gsm, 140gsm, 210gsm, 250gsm, 300gsm, 350gsm and 400gsm.
250 GSM and above is the best for paper sculptures
but consider what type of paper can be handled by your printer!
So now to proceed you have to simply follow those steps:
CUTTING
FOLDING
ASSEMBLY
CUTTING AND FOLDING
Here is a picture of the tools I use for the manual cutting and folding steps:

cutting mat
rulers
cutter
while for the assembly step
glue (for the assembly step)
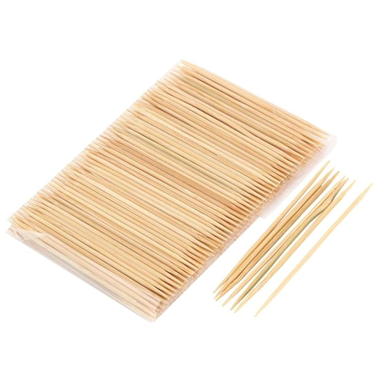
toothpicks (for the glue)
now to proceed you have to know how to "read" each part of the sculpture
Every piece (or component) of the sculpture can bring this information:

let's see one by one every information:
COMPONENT: is one of the pieces in wich the sculpture is brokendown. Consider that the printed side of the page will be inside the sculpture. In this video i'll show you the difference between the printed side that will be the inner part of the sculpture and the other side that will be the outer side of the sculpture.
SOLID LINE: is the line you have to cut manually or thru a cutting machine (Silhouette, Cricut, etc)
MOUNTAIN FOLD LINE: looking the paper sheet from the outer side (not printed side) you will have to fold paper in order to have an upside down V
VALLEY FOLD LINE: looking the paper sheet from the outer side (not printed side) you will have to fold paper in order to have a V
FOLDING FLAP: is the flap that will allow you to put together, by glueing them, edges of different components. Flap has to be folded in accordance to the related folding line (mountain or valley).
ASSEMBLY
The final step, the most relaxing, the most satisfying!
I’m going to show you pictures taken from my Italian tutorial.
Now you need glue!!!!
LIQUID GLUE (best choice)
GOOD: if you use a small bit!
no smell
dries quick (3 to 5 mins)
easy to use and is more precise
BAD: if you use a lot of it!
hardens in 60 mins
dries slower (5 to 15 mins)
can soak your paper and distort it
cannot redo mistake, once dried, it is glued forever
I use this glue:

HOT GLUE
GOOD:
hardens in 30 mins
cools down + dries quick (2 mins)
you can heat it and "move" your glued parts a bit if you made a mistake
BAD:
less accurate
needs electricity
burns your fingers if not careful
smells a lot (makes you sick, headaches)
SOLID STICK GLUE
please avoid it!!!
Now, let’s talk about edge id #.
Ok i have many pieces ready (cut and folded) now what?
In order to put together 2 different pieces you have to follow a simple rule!
PAIR EDGES WITH SAME ID#
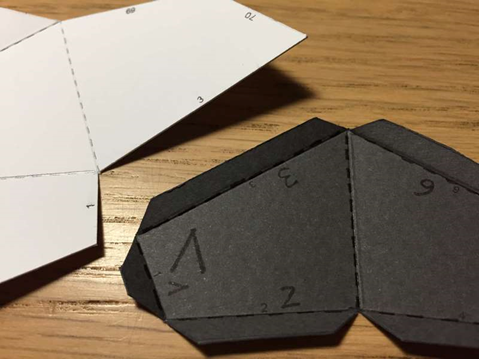
I already mentioned that every edge of the sculpture is identified with a number (here is an example of parts taken from my italian tutorial):


Once that every fold line was folded...
The simple rule you have to follow in order to assemble the sculpture is that you have to couple edges with the same ID#
To do this, the tool you are going to use is:

Put a small amount of glue on a piece of paper

distribute the glue on the flap number 3 (for example) using the tooth stick and don’t soak the paper...

Now couple the two edges numbered #3 like in the following picture:

Place the 2 pieces in order to have a perfect overlap of the the flap with the edge of the other piece and then press for 10-15 seconds:

Now repeat this procedure for all the pieces of the sculpture.
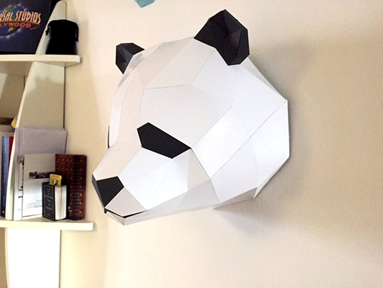
The final result will be ✌️:

Here is a PDF of the Panda that you can print an practice on
👉👉👉 Click on the panda gif to download it!
Conclusion
How you assemble the parts but also the sequence that you follow can influence the final quality of the sculpture.
For example, starting from the ears of the Panda bear is not the same that starting from the nose!
Now you know almost everything about 3d sculptures.
You can see all the models that I created on my Instagram account but I also have hundreds of other subjects.
Feel free to contact me http://m.me/meshcrafter
The DIY kit for each sculpture consists of:
pdf template, dxf files, svg file, jpg files
general instructions (mainly the final part of this tutorial)
parts layout showing for each page the corresponing 3D part into the sculpture

👉 Thank you for your patience


Comments